Wednesday, February 27, 2013

Goofus Bug Tute


Goofus Bug Tute

better known as the Humpy
I catch smallies as well as largemouth on this one

hook; #10 7957B mustad
thread; orange
tail; deer hair
wing; calf tail upright and divided
overbody; deer hair
underbody; orange floss
hackle; coachman brown (drk ginger or brown hackle substitute)
material

1 clamp in hook and make a thread base along hook shank
2. cut deer hair for tail and even up tips in hair stacker.
tail length should be hook length.
important.
a) start at bend and hold tail. loosely wrap deer hair on top of shaft to half the distance of shaft
b) trim butts than tightly wrap over deer hair back to bend. this will keep deer hair from flaring and wrapping around hook

3. tie in calf tail wing (length is same as tail) leave room for thread head.
tie in, divide and figure 8 wrap. trim butts of wing at butts of tail on shank. leave thread behind wing with a gap between

Front view after raising wing and tying in with figure 8's


4.Overbody; cut deer hair and even tips in stacker. lay hair on shaft with tips even or a little longer than tail. tie in hair behind wing leaving a gap. tie in tight so butts flare UP. wrap thread over hair to bend and trim flared butts.


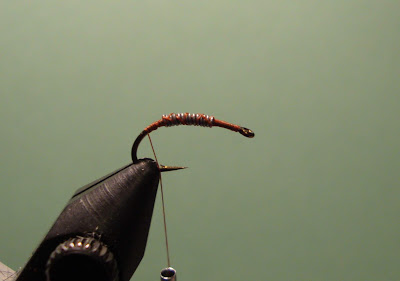
5.Underbody; cut strip of orange floss and fold.
i seperated overbody from tail in this pic.
tie in floss just in front of deer hair


6. wrap forward over deer hair. wrap 1 or 2 wraps in front of wing and tie off.
bring thread behing wing.


7. pull deer hair over floss between wing. tie down tight behind wing and trim butts


8. tie in hackle feather. (use two hackle feathers if you want a more fuller fly)

9. wind hackle and tie off in front of wing
10. make thread head, whip finish and cement head.


swarm of Goofus bugs


oh almost forgot.
swarm around frog popper


~doubletaper

Tuesday, February 19, 2013

Latex Caddis Tute

Latex Caddis Tute


 Here's one of my favorite caddis nymph ties i use especially for hatchery stocked fish. A lot of fishermen up this way use grubs, (maggots), and this one must imitate them well. The green colored ones, shown after this tute, work well also. I started tying these on straight hooks but i like the the way they look on a curved shank hook better. You will notice i weight the hook as i do on almost all my nymphs. This gives the body some bulk but mostly gets the nymph down quicker and there usually is no need for pinching weight on a light tippet/leader that weakens the tippet/leader.
 
Hook; Mustad c49s curved caddis
Thread; Brown*
Weight; .010 lead wire
Body; Latex strip
Thorax; Brown rabbit fur*
Tint; Olive green or limepeel prisma color marker (optional)
Note * Use black thread if making thorax out of black fur

Material


I know what you're thinking!!
You can buy the latex finger cots at most pharmacies. unroll one and cut an oval strip (very sharp scissors makes a neater cut). Take the oval strip and cut it at an angle leaving you with pointed ends.
 
1. Wrap a thread base on the hook and counter wrap lead wire leaving room to tie in latex behind and thorax behind the eye


2. Fold latex strip and tie in at bend with fold down and facing you 


3. Wind folded latex spiraling towards front in even wraps.
4. Tie off latex in front of lead leaving room for thorax


5. Dub thorax with brown rabbit fur
6. Make head with brown thread and whip finish.

walla!

Tinting latex caddis with prismacolor marker.
Tint after tying in latex. Start at butt of body and sweep the marker over the body towards the front of fly.

olive green

Limepeel with black thorax

Finished products

~doubletaper


Saturday, February 16, 2013

Smoke'n With Glass

Smoke’n with Glass
2/10/13


The pessimist says the glass is half empty where as the optimists say it’s half filled. When it comes to fly fishing for trout I always look optimistically, even when the conditions don’t appear to be good to most.

  I hadn’t fished for a week or so because of the snowy and freezing conditions in the area. There was a break in the weather this past Sunday and since I’ve been waiting to try out a used 6wt Wonderod ‘glass’ fly rod I received from a friend, I figured on giving it a casting lesson. I’ve wanted a 6 weight fiberglass rod for using down the river for smallmouth and was hoping this one would suffice. I also had a few fine cigars I wanted to puff on so this February day was more than just catching fish. Of course I always expect to catch at least one!!!

  It was around 1:00pm when the temperature was a balmy 37 degrees outside with the sun shining brightly. I wasn’t sure how much snow melted or ice was still on the creeks so I wasn’t really sure how the day was going to go. I packed the van and lit up a La Perla Habana Cameroon Figurado before I even pulled out of the driveway. The genuine Cameroon leaf wrapper has a thick leathery bite to it as I held it between my teeth. The tobacco within is bolder than most Cameroons I’ve tasted making this one of my favorites under $2.50 a stick. As the cigar burns to a larger diameter after the lite up, of this figurado, it isn’t long before I taste the nutty, peppery inner tobacco. I got these on a special offer and though I don’t like taking a chance on something I never smoked before, these were one of my better buys. As I head north I enjoy the smooth draw and bold cigar flavor.
  There are times I wish I lived in central PA. There, there are many limestone and wild trout streams with easier access, during the snowy months, than here were I live near the Allegheny National Forest. Being I have a rear wheel drive conversion van I learned not to take my chances on ‘no winter maintenance’ roads within the ANF. There is no doubt that the off-the-beaten-path roads were going to be icy so choosing my destination would have to have serious thought. If only I had a 4 wheel drive.
  My first intentions were to try out the 6wt rod in the Clarion River upstream from Cooksburg. When I approached the bridge on rte 36 east I glanced over and seen floating patches of ice resembling varied edged puzzle pieces as if lying on a card table. There was no way I wanted to try fishing in those conditions so I continued on towards Brookville. My last couple of outings for trout was a small stocked/wild trout creek but I wasn’t in the mood and wanted to try somewhere different. My main goal was to cast the 6wt fiberglass anyhow. Even though it was heavy for trout I knew a good easy accessible project area that will do fine. As I drove up the lane to the park I glanced over and seen the bright clear water was in great, inviting, flowing condition. I couldn’t wait to wet a line.
 
 
  I fitted the 2 piece 8’ 6” Wonderod together and attached my Orvis Battenkill mid arbor reel that has F6WF line, the only 6 weight spooled line I have. I put a few fly boxes and items into my wicker creel and headed down towards the water.
  A couple of fly guys were casting into a wavy current flowing through a line of boulders that created a pool down creek. They were casting from the snowy bank. I stopped along the bank, down from them, and looked over the water conditions. I decided to start with a Wooly Bugger in this way I can get the cold coiled line to straighten out and get a feel for the rod with a variety of lengthy casts. A thin sheet of ice extended from the bank on the slower current back eddy. I stepped onto the ice and it cracked with my weight and I was instantly in shin deep water as I expected. Slowly I moved my legs forward as I pushed on the Ice, cracking it further out with my hand. I began to feel the coldness of the water through my waders, fleece and winter under garments. My waders weren’t leaking, mind you, just the coldness of it. Soon I felt the coldness also on my feet, nothing I hadn’t fished in before. Once I got the sheet of ice cracked to the other edge I slowly pushed the ice slab down creek. It moved as a sheet until it met with a faster current that flowed between and over a conglomeration of uneven edged boulders. The sound of the ice cracking and tumbling between and over the boulders was like lightly twirling a glass of cubes in an empty whiskey tumbler waiting for a refill.
  My first few casts were relaxed and easy concentrating on the load and flex of the fiberglass. It wasn’t anytime at all that I was casting for distance. Once accomplished to my satisfaction I began to concentrate on my fishing.
  Mid stream, in the deeper portion of the creek, there were a few submerged flat boulders resting on the creek bed that I was able to see.
 
 
 I methodically cast up creek, with a mend, and let the bugger drift through as if nymph fishing. At the end of the drift I twitched the bugger back towards me before the next cast. For about an hour I switched streamers and fished a few nymph patterns, in tandem, without a strike. Needing to get my feet and legs moving before cramping up in the cold conditions I decided to get out of the water and move down stream. Up on the walk bridge I took a moment to light up an 8-5-8 natural Fuente. The fresh aroma of the tobacco was instant the moment I put the cigar to my lips. The light was perfect and like any fine Fuente cigar, it was smooth, mild and without a bit of bitterness. I looked over the bridge down creek and than continued to the other side.
 
 For the next half hour I fished under the walk bridge but didn’t have any success. For the rest of the Fuente I fished my way downstream changing from nymphs to streamers, again without any hits. I started flipping over rocks in the shallows trying to discover what might get a trout to take. I found a black headed brown Dobson nymph under a flat rock. I let him go and took out a brown Wooly bugger. I trimmed off the palmered hackle on top and trimmed the marabou tail a little shorter. I attached an indicator up from this and decided I would concentrate with this as long as possible. Moving up creek I fished my way up towards the walk bridge without success.
  My last chance would be where I started so I crossed the bridge and headed up. The other fishermen were gone and I had the whole pool to myself. The sunlight started to fade in the distance and cast a half shaded shadow over the water before me. The air began to become a bit nippy so I upped my fleece color and put down the ear flaps on my Yukon Cap. For the next hour I proceeded to try and catch a fish….again. I did have one bump of what I thought was a fish but it may have been just a chunk of ice that happened into the path of my line. I finally gave up well before it got dark. I was hungry, cold and though fishless, felt good about the days outing. There isn’t many times I go without catching at least one trout but it does happen to the best of us now and then.
  Back at the van I warmed the vehicle as I changed into street clothes. Before leaving I nipped off a bit of the cap and toasted the foot of a Fuente Maduro Perfecto………. Just a pleasant way to end a cold fishless February day!
 
~doubletaper


Friday, February 1, 2013

Dry Fly Tute

Dry Fly Tute

There are a lot of newbies getting into fly tying. I figured I'd give a tute how to tie a basic catskill tied dry fly. Tail, dubbed body, wings and hackle. Nothing fancy. This is an in depth look at each step.
 This is my way of tying and I'm sure there are others that change the steps or tie them differently. Eventually everyone finds their easy way of tying.
Hope this helps.

I'm using a basic March Brown pattern. I use a standard, 1x or 2x long dry fly hook depending where I'm fishing and the size of the March Browns in the area.

I didn't strive for perfection, (doing a tute is hard enough), but I wanted to get you familiar with the steps.  


 Hook; 84831 #12 2x mustad
Thread; orange
Tail; ginger hackle barbs
Wing; heavy barred wood duck flank upright and divided
Body; light red fox fur and seal fur mixed. Or match-the-hatch March Brown dubbing
Hackle; 1 ginger hackle and 1 grizzly hackle from a rooster cape

Wing= hook length
Tail= wing length
Hackle= shank length


I start the thread about a 1/4 way back from the hook eye and wrap forward to behind the hook eye. I then wrap over the previous wraps towards the back of the hook stopping at the end of the hook shank. If you let the thread dangle it should be about even with the hook barb on most hooks.


Measuring tail

 Tying in the tail
Start at the end of the shaft and wrap forward

measuring the wing
 

Bring the thread about a 1/3 way behind the hook eye and tie in the wing with the tips over the hook eye.

Wind a few wraps behind the wing, lift up the wing, and a few wraps in front to stand the wings up. They don't have to be perfectly upright at this step if you tie the fly like I do.
 Remember this fly should float so the fewer wraps the less weight! Make sure they are tight

 Trim the wing butts at an angle to the hook shaft about where the end of the tail was cut. In this way when you wind the thread back to the tail it will taper nicely.

Seperate the wings and tie in figure 8's between the split wings and under the hook


Wind the thread back to the tail in tight wraps

 You're ready to dub the body. Specific, already mixed dubbing is fine and easy but doesn't always match the exact color of the fly on all streams.
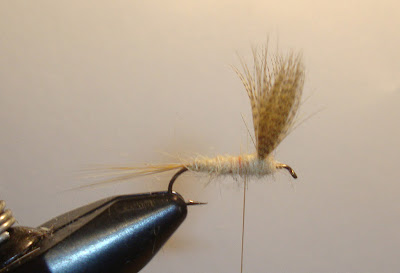


This is where most tyers find problem. To ease the dubbing process here's my tips.
1. If the dubbing feels too slippery use dubbing wax on your finger tips and/or thread. Get the tacky or sticky wax.
2. Twist the fur on the thread in only one direction.
3. You DON'T have to get the precise amount to cover the body on the thread when you start. You can add as you go.
For fat bodied flies, be it dries, nymphs or others, do not put a big gob of dubbing on the thread all at once. Keep with a generious amount that holds to the thread nicely. If after the first wraps, the body needs to be bulkier, add another wrap of more dubbing.


Dub the body forward towards the wings with even close wraps.
Dub a couple of wraps in front of the wings to stand the wings up straight. I havn't found any disadvantages of tying in the dubbing this way. My flies still float correctly and my wings stay upright like I want them

 After dubbing return the thread behind the wing as shown.


 For this fly I'll use one grizzly hackle feather and one ginger hackle feather.
Gauge them to size is easier using a hackle gauge.
When you trim the base don't trim it right to the stem. Leave some cut fibers extending out to catch the thread keeping the hackle from slipping out.


Lay the first hackle feather on the dubbing, sideways as shown, with the butt between and extending through the split wings. (This will also keep your wings seperated should they get wet)

Tie in the 2nd hackle over the first hackle.

Wind your thread to the front of the wings and tie down the hackle butts. (trim off the butts that hang over the eye)
Keep the thread back from the eye
 Grab the top hackle with your hackle pliers and wrap forward. usualy 3-4 wraps behind the wing and two in front if you left enough space.

tie in and trim the hackle before proceeding to the next hackle


Wrap the bottom hackle right through the first wrapped hackle the same amount of wraps. Tie off behind the eye
 
 After wrapping a tapered head behind the eye I use a hollow tool, as shown, to fit a few tight wraps of thread up against the hackle.


Finish tying down and I always dab the head with head cement.


If the wings look too long then go ahead and trim them. I personally try to make the wings correct without trimming them. I don't know if the fish mind one way or the other


I hope this helps those who are getting into tying dry flies. There is no greater feeling, in fly fishing, than to see a fish rise to your hand tied dry fly!!
 
~doubletaper